Connecting Tableau Desktop to Neo4j Database
Tableau Desktop is a powerful data visualization tool that allows users to analyze and visualize data from various sources.
Introduction
If you're working with a Neo4j database and want to integrate it into your Tableau workflow, using the ODBC connector is a seamless way to establish a connection. In this blog post, we will walk you through the step-by-step process of connecting Tableau Desktop to a Neo4j database using the ODBC connector.
Prerequisites
Before we begin, make sure you have the following prerequisites in place:
-
Tableau Desktop installed. You can download it from the official Tableau website.
-
Neo4j ODBC driver installed. You can download it from the official Neo4j website. (As per system requirements, select the appropriate Neo4j Driver version and download it.)
-
Access to a Neo4j database with the necessary credentials.
Steps to Connect Tableau Desktop to Neo4j Database
-
Install and Configure Neo4j ODBC Driver
- Here, we are downloading and installing the Neo4j ODBC driver for Windows on our machine.
- The downloaded file, named Neo4j-BI-Connector-ODBC-1.1.0-windows.zip, will be in zip format. Extract this file, which contains Simba Neo4j drivers for both 32-bit and 64-bit systems. Choose the appropriate driver based on your system configuration.
-
Open Tableau Desktop
- Launch Tableau Desktop on your computer.
-
Connect to Data
- In Tableau Desktop, go to the "Data" pane on the left.
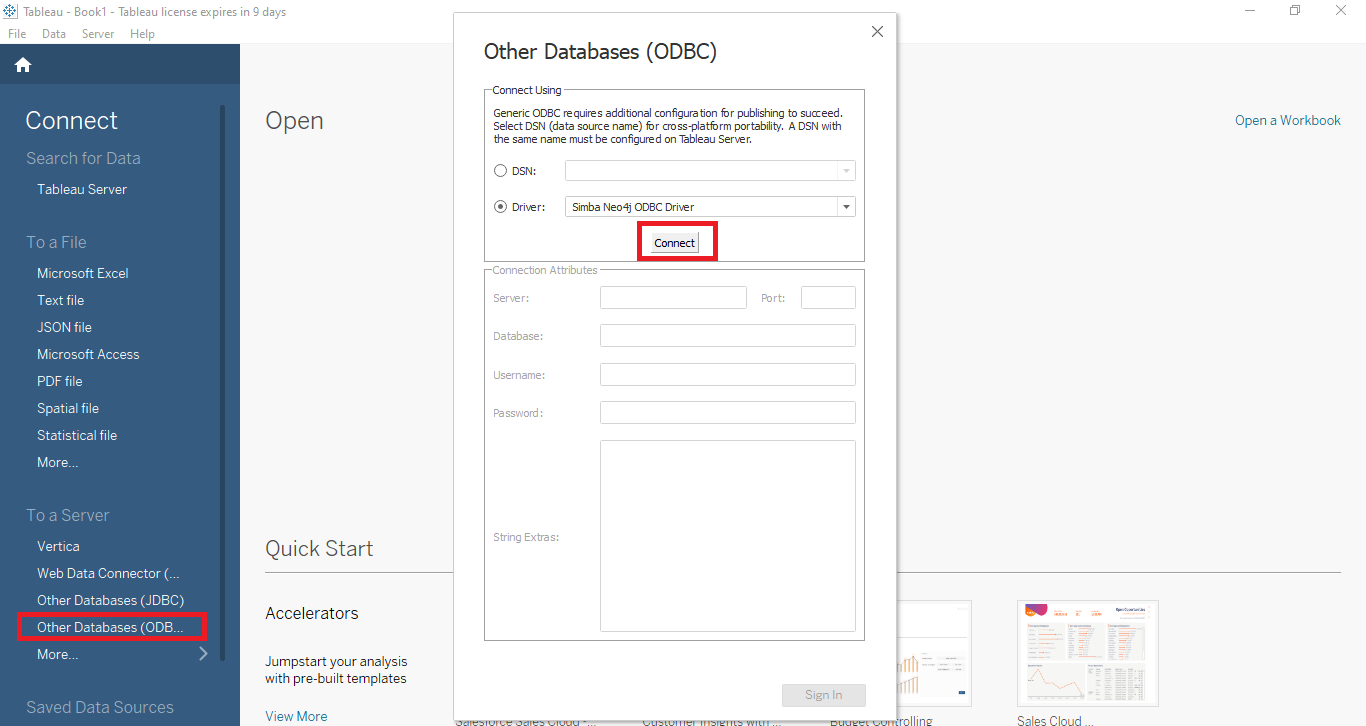
- Under "To a Server," select "Other Databases (ODBC)."
-
Choose Neo4j ODBC Connection
- In the "Driver" field, choose the Simba Neo4j ODBC Driver and click on "Connect".
-
Enter Connection Details
- Enter the necessary connection details, including the username and password for your Neo4j database and click on "Ok".
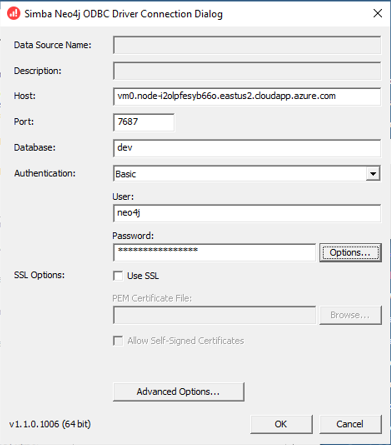
Select the required host, port, database, username, and password for the Neo4j database. We are using the default port 7687 here.
-
Sign-In to Neo4j
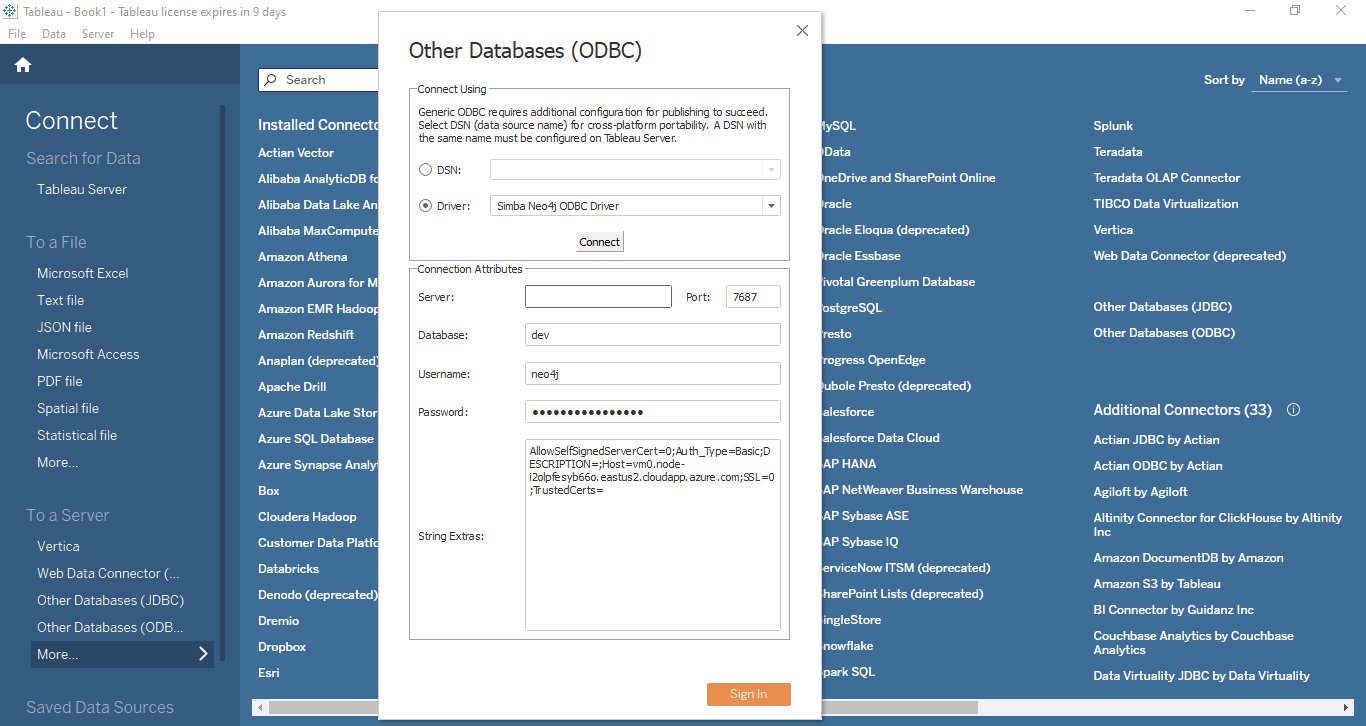
- Connection attributes will be displayed with the credentials that we passed in the previous step, and finally, click on 'SignIn'.
-
Select Data for Visualization
-
Once the connection is successful, Tableau will display a preview of your Neo4j data. Select the specific "Schema" and "Table" you want to visualize.
-
Click on "Sheet 1" to start visualizing the data.
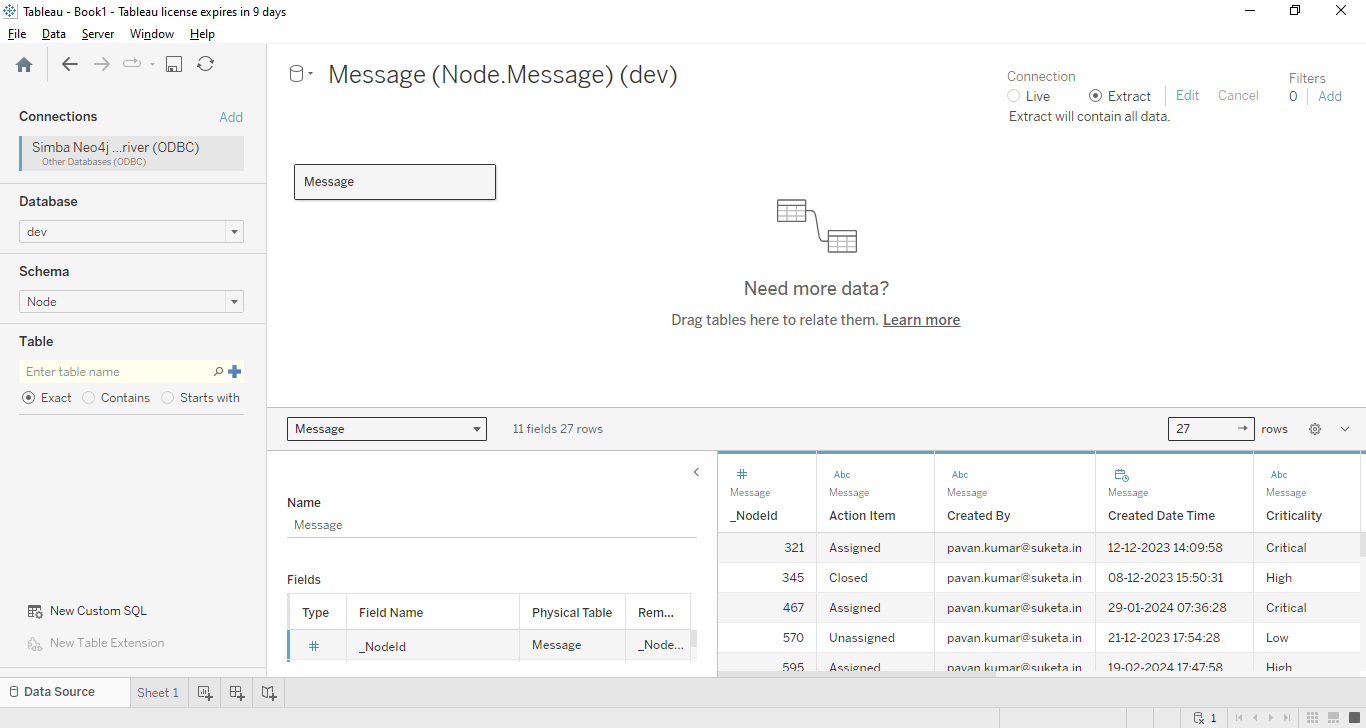
We are aiming to retrieve data from the Message table in this example. You can explore other tables as well based on your requirements.
-
A popup will appear after the user clicks on Sheet1, asking, "Create a Tableau data to use the full functionality of Tableau" Click on "OK" to proceed to Sheet1.
-
Create Visualizations
- Select Neo4j DB tables based on your requirements and drag-and-drop them into rows and columns to create insightful visualizations in the worksheet.
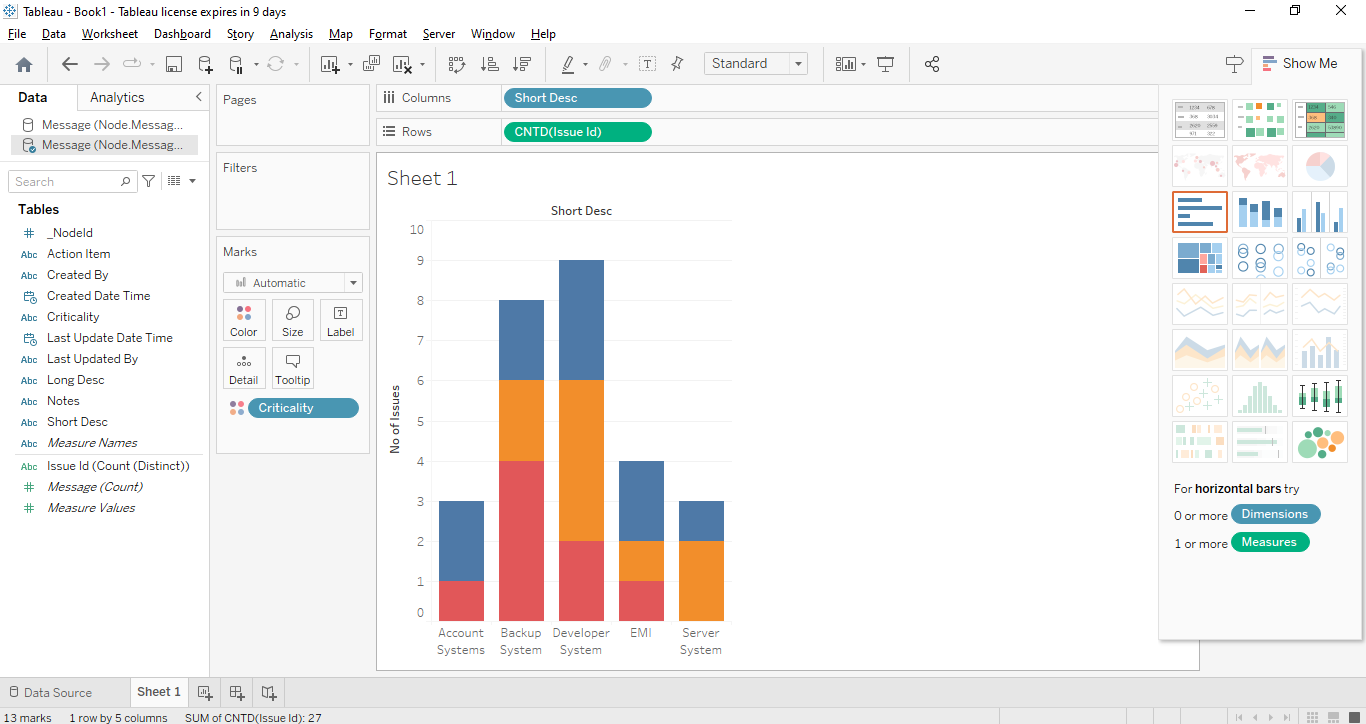
The graph above illustrates the number of issues and the associated criticality in each system (Backup, Developer, EMI, Accounts, and Server).
-
Save and Share
- Save your Tableau workbook, and you're ready to share your Neo4j-powered visualizations with others.
Conclusion
Connecting Tableau Desktop to a Neo4j database using the ODBC connector provides a seamless integration, allowing you to leverage the power of Tableau for data visualization and analysis. Follow the steps outlined above, and you'll be well on your way to creating compelling visualizations from your Neo4j data.