Establishing a Connection to ANANSI in Power BI Desktop
Power BI is a powerful business intelligence tool that allows users to connect to various data sources to analyze and visualize information effectively.
Introduction:
One of the key features of Power BI is the "Get Data" option, which enables users to retrieve data from online sources. In this blog post, we'll guide you through the process of connecting to the web in Power BI using the "Get Data" option.
Step 1: Launch Power BI Desktop
Start by opening Power BI Desktop on your computer. If you haven't installed Power BI Desktop, you can download it from the official Microsoft website.
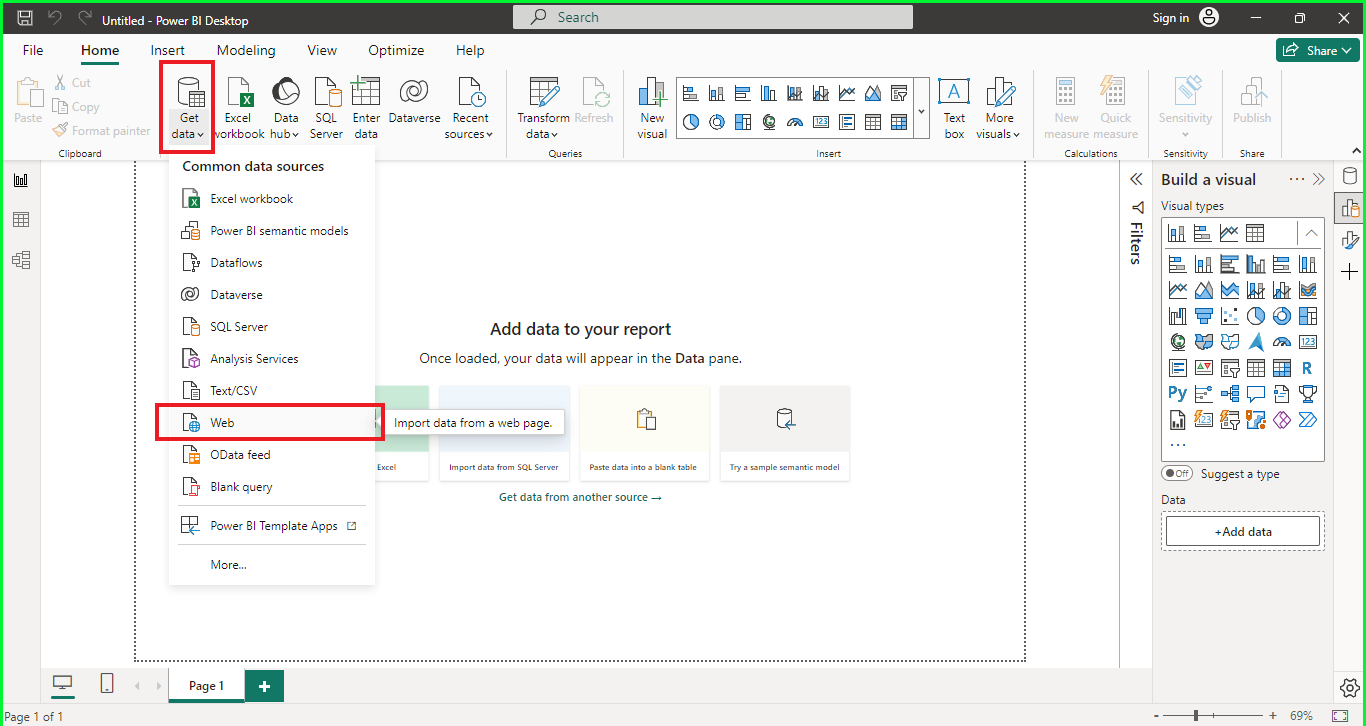
Step 2: Click on "Get Data"
In Power BI Desktop, click on the "Home" tab in the ribbon, and then click on the "Get Data" option. This will open a dropdown menu with various data source options.
Step 3: Choose "Web" as Data Source
A window will appear displaying a list of data sources. Scroll down or use the search bar to find and select "Web" from the list. Click on it to proceed.
Step 4: Select Advanced and enter the Web URL
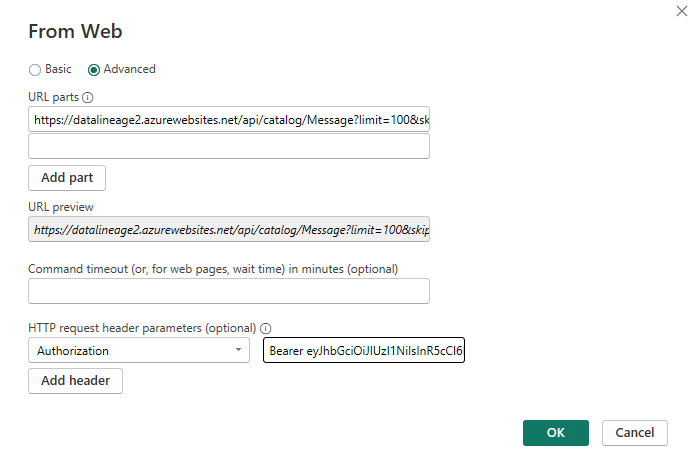
In the 'From Web' dialog box, enter the URL of the API you want to connect to. Ensure the use of the correct endpoint and add Authorization parameters. Once you've entered all the required information, click the 'OK' button.
-
For URL parts we are passing our ANANSI tool backend url https://datalineage2.azurewebsites.net
- In the image above, you can observe that I appended "/api/catalog/Message?limit=100&skip=0" to the end of the URL parts in accordance with our API Specification documentation. In this instance, we are aiming to retrieve data from the Message table
-
For HTTP request header parameters, pass the key-value pair as Authorization: Bearer API_TOKEN, replacing API_TOKEN with your actual token.
Step 5: Selecting the Authentication Mechanism
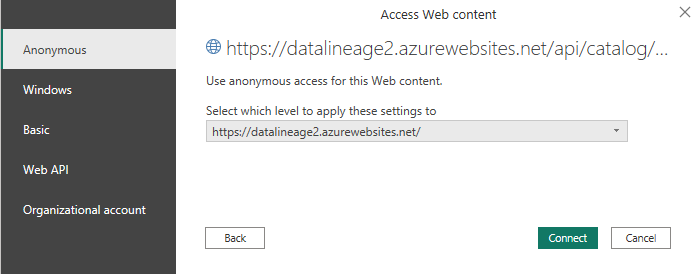
Next, choose the authentication method as 'Anonymous.' Power BI will then attempt to connect to the ANANSI database using the provided details.
Step 6: Transform and Clean Data
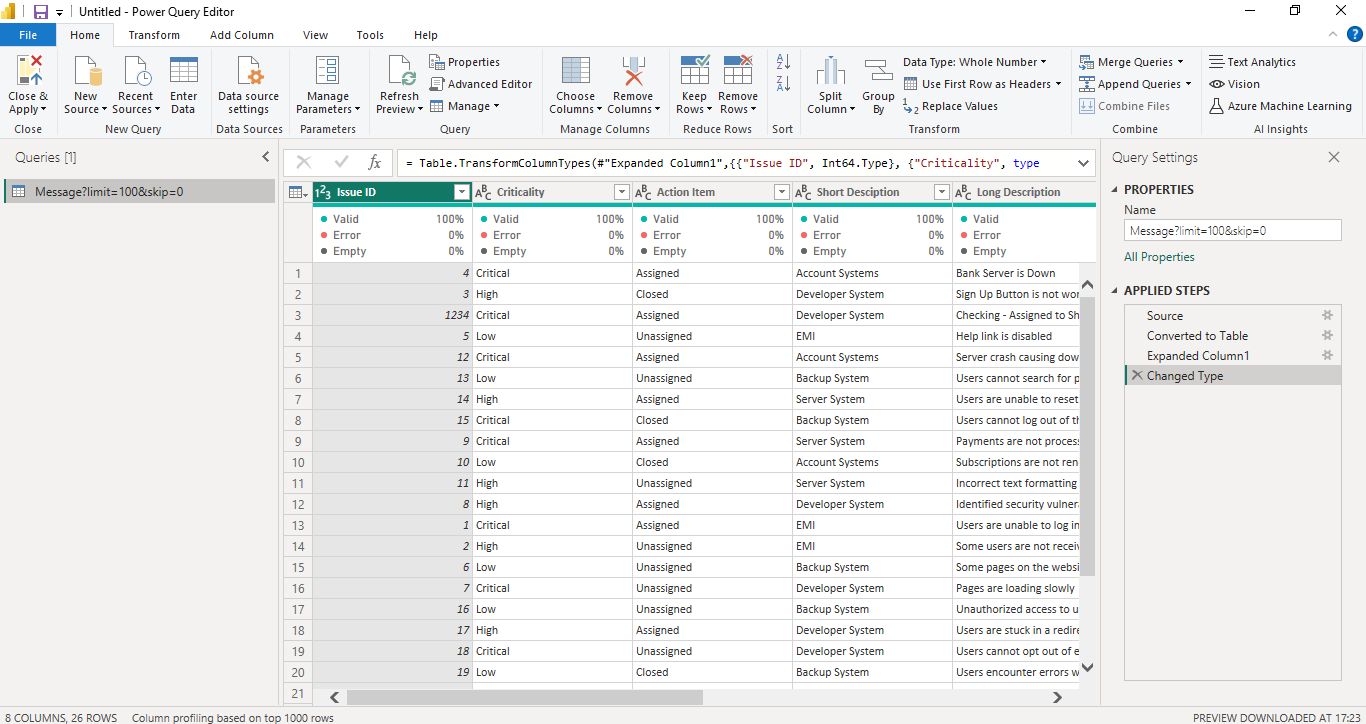
Once the data is loaded, you may need to transform and clean it to suit your analysis needs. Power BI provides a robust set of tools for data shaping and cleaning. Utilize the "Transform Data" option to perform tasks such as filtering, renaming columns, or changing data types.
Step 7: Build Visualizations
With the data loaded, you can now start building visualizations, reports, and dashboards within Power BI to gain insights from your ANANSI Server data.
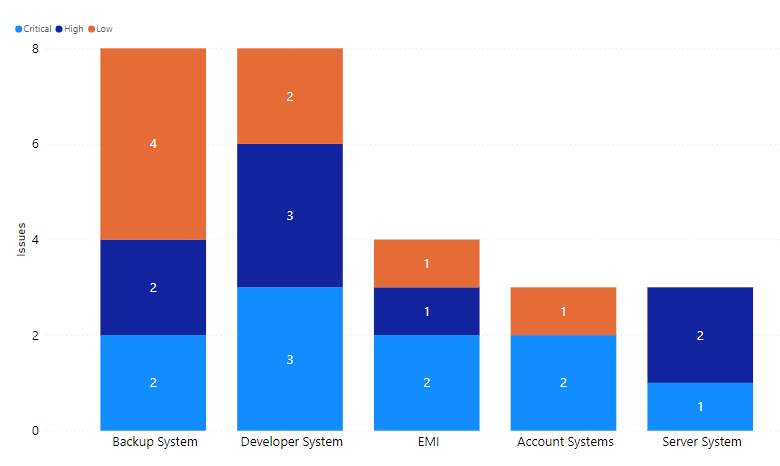
The graph above illustrates the number of issues and the associated criticality in each system (Backup, Developer, EMI, Accounts, and Server).
Step 8: Save and Publish
Once you are satisfied with your report, save your Power BI file. You can also publish it to the Power BI service to share it with others. In the Power BI service, you can set up scheduled refreshes and manage access to the report.
Conclusion
Connecting to ANANSI in Power BI Desktop is a straightforward process that enables you to leverage the power of external data sources for your analyses and visualizations. By following these steps, you can seamlessly integrate ANANSI data into your Power BI reports.